Showing posts with label DIY. Show all posts

Monday, April 14, 2014

Arr arr! Make A Baby Seal Cake!


Heehee! I've never eaten real baby seal... that seems very, very wrong. However, a cake made to look like a baby seal? That's just right! Click on over to my baby seal cake DIY at Handmade Charlotte.

Thursday, March 13, 2014

How To Decorate A Cake: One Cake Three Ways


I gots some sweet cake decorating ideas for lazies today! Check out my post on how to decorate a cake on You Are My Fave - including this candy topped beauty. Shortly after this photo was taken all of the mini eggs and malt balls were destroyed by ingestion. Candy problem, right here!!

PS you're not lazy. Even if you are, lazy cake decorating can still be great.

Thursday, January 23, 2014

And A Cool Time Was Had By All: My Cake Toppers Workshop!


Hooray! The amazing Erin of Collage Collage invited me to teach a cake toppers workshop as part of their Adult Craft Night series. I had to come up with some cute ideas to teach the attendees. I had a horse ribbon inspired cake topper in mind, and I wanted to do something with alphabet pasta letters, inspired by a super cute DIY I had seen on Oh Happy Day a few years back. I had mentally thought about (ok, let's say mind-spiraled) what I would make for weeks and then on the day of the workshop, I sat down and worked out what the projects would be, making them beforehand so I could do a cooking-show-style "voila!" reveal!

I was pretty stoked with what I ended up coming up with - these guys - Treat Yo Self alphabet pasta letter banner and You Rascal horse ribbon cake topper!


I baked up some chocolate cupcakes with vanilla buttercream and sprinkles for the workshop attendees, both to snack on while they worked and each attendee got to take one home in a cute little box, too!

What a cute bunch of crafty  ladies indeed (and a quite adorable helper, Erin G!) Adult Craft Night is such a fun way to blast away for a few hours and use your hands to create something cool. A nice break from computery internet-overload times, I would say! I want to sign up for the next one!


Can you spot Coco Cake Land in this pic? Yeah. The nerdball holding up a cake banner topper! I sure had a great time!
And take a look at these great projects my ladies made! Pretty sweet. I feel excited that all of those future birthday cakes will be dolled up by some very cute hand crafted cake toppers. Thanks again Erin for inviting me, and many thanks to my new cake pals who attended the workshop! Looking forward to doing another one in the future.

xo Lyndsay

Friday, December 20, 2013

Mountains + Moon Snowy Cake For Poppytalk: Holiday Cuteness!


I'm in love with this super sweet cake topper DIY I made for Poppytalk - I want to face-plant into that white, billowy whipped cream and make, like, fifteen snow angels. Click here to see the full mountains and moon cake topper DIY.

You can find Coco Cake Land (me!) elsewhere this week over at ye olde Craftsy this week, too - with a helpful Cake Inc blog post on Tips On How To Write A Business Plan For Your Cake Business. 

More beauty on the internet - fave posts of the week: 

The coolest puffy sculptural honeycomb wreath DIY by Chiara over at Oh Happy Day.

Gosh darn it Amelia from The Homebook is such a funny, cool creative mama. Love her book-inspired gift wrap over on You Are My Fave.

Love this simple triangle wreath DIY over at Almost Makes Perfect.

Happy weekend, dear cake pals!

See you soon with more cakey cuteness.

xo Lyndsay

Friday, December 6, 2013

DIY ABC Stencil Cake + More Cakey Times


Loving this super cute, bright and cheery ABC stencil cake I made over at Handmade Charlotte! Perfect for a kiddo's birthday party - make 'em learn while they're eating their cake, right?

This is a fun post I wrote for Craftsy on how to use social media for your cake business! I hope you find some fun and jazzy tips in it. Let me know what you think! As I'm sure you know, I think social media is just too much fun - I love interacting with new friends and cake fans. I've met a lot of great people through it and I encourage you to use it for any type of business or just for pleasure.

I also wrote a post on Finding Your Niche within the cake design world - however, I think it can apply to all aspects of art and design! Check out my Craftsy post on Finding Your Niche here.

A few more posts for Craftsy:

Illustration based cakes - I am in love with some of these awesome drawing and illustration inspired cakes. Reminds me of my graphic novel/comic hoarding days.

Vintage Cake Design: Birdcage cakes. You'll be blown away by some of these birdy cutie beauties!


Plus, my super cute JOY silver fringe letter DIY and peppermint buttercream cake is featured on Poppytalk's 10 Festive Party Cake Ideas - click through to see all the MEGA cute holiday themed cake ideas she's rounded up for your holiday fetes. I have so many already on my Coco Cake Land Pinterest boards!

Happy Friday, everyone! Are you getting in the holiday swing of things yet?? 

xo Lyndsay

Cupcake photos by Amy Pelletier. All other photos by me! :)

Wednesday, December 4, 2013

Peppermint Party - Silver Fringe Letter Garland DIY


Today's post is sponsored by Minted.com 

Happiness and joy - I finally made something fringe! I admire my pal Kelly over at Studio DIY's magical wicked awesome fringed wonders all the time - I pin them and drool over them and say, oh yeah. I'll make that - but never get around to it! My peppermint party for Minted seemed like the perfect opportunity to make a silver fringe letter garland - since I'm nuts about lettering and typography, too. Plus, I'll let you in on an easy breezy supplies secret - (also known as: didn't have time to source silver mylar) - I used regular old tin foil and some recycled cardboard to make it. 

You can find everything you need to make this super cute JOY letter garland in your own home, bringing some wordy sparkle to your holiday this year. 


I was also inspired by the insane in the membrane crafty awesome Jenny over at Hank + Hunt - I saw her super cute LOVE letter garland and I... loved it. Hee! 

Here we go - get into the garland party zone!
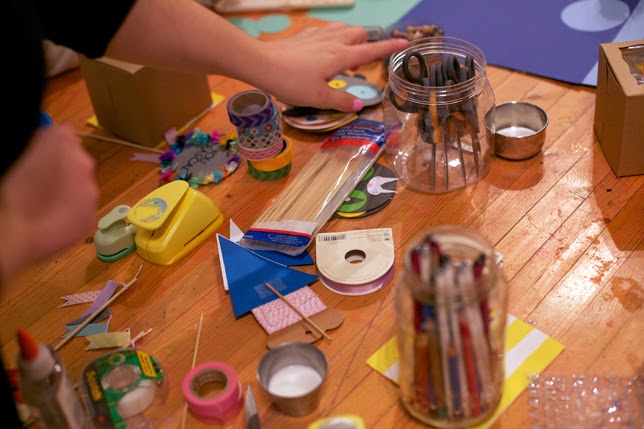
You will need: 
  • Tin foil, cut into strips - I cut mine into 1 inch tall strips. 
  • Scissors
  • Gluestick
  • Cardboard
  • String
  • Tape


Step One: Cut out your letters from cardboard. I freehand drew my letters onto the cardboard - if you wanted a particular font you could always print out large letters off your computer, trace onto cardboard and work from there. My letters are about 8 inches in height. 


Step Two: Cut strips of tin foil off in 1 inch high strips. Start fringing away your strips - snip snip snip! Approximate the length across the letter you're working on and cut to the general size. Note that the tin foil has one extra shiny side and one more matte side. Glue down your first fringed tin foil strip, shiny side up, at the bottom of the letter and work your way up. Don't worry if your tin foil fringe length is too wide for the letter you're working on - you can trim it up later. 

Pretty fringey bits! You can save this for table confetti if you like - so shiny!

Step Three: Turn your letter around. Trim away the excess tin foil along the edge of your letter to regain the shape of your letter.


Oh joy, you finished! Yay! In the end I decided to cut a triangle V out of my letter "Y" to make it look more "Y"-like. Then I had a fringey little triangle shape, so of course I turned it into a cake topper.
 Step Four: Turn your letters over and adhere it to a nice piece of string or twine using good old scotch tape.
Minted has these ridiculously adorable and insanely easy to use tissue paper fans for sale that add so much cuteness to your party set up in literally twenty seconds. If you are familiar with my party design style, I like a simple mix of modern, vintage, DIY and playful. The tissue paper fans did the trick as a sweet backdrop for my JOY garland. 
It wouldn't be a 
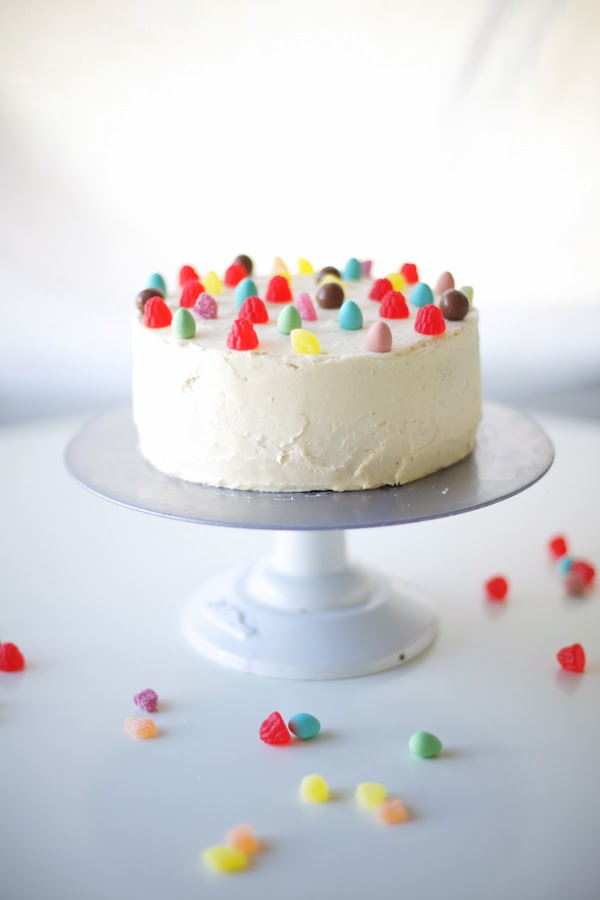
Coco Cake Land party without a cake! I made a chocolate cake with mint green peppermint buttercream piped in a vintage style. That "V" shape? I taped it onto a wooden BBQ stick and BLAMMO - cake topper! :) I found those pretty pastel scotch winter mints in the bulk section of the grocery store. 


Minted makes the cutest custom holiday cards probably ever! Love how my card turned out with my little T-man. It was so easy to make, too - go internets go!

Ah, DIY love! What word(s) would you make into a shiny silver letter garland? That was fun - see you soon, cake pals!

xo Lyndsay 

This post was sponsored by Minted.com. Order your Minted holiday cards now - total cuteness awaits! Tissue paper fans, cake stand, little cake sign and holiday cards also provided by Minted. All opinions expressed are my own - yes, I do love Minted! 

Tuesday, October 22, 2013

Halloween Cake: Mutant Bunny Cake DIY


Oooh I made this hilariously deviously cute Halloween themed cake DIY for Handmade Charlotte! Mutant bunny cake! This will jazz up your Halloween table big time, guys. Let me know if you try it!

Full tutorial over on my mutant bunny cake DIY post at Handmade Charlotte.

 xo Lyndsay

Tuesday, October 15, 2013

DIY Paper Plate Animal Mask Party


I created this super cute and easy to make animal mask out of this adorably patterned tableware set from Shop Sweet Lulu. No need for paint and markers when you have a pattern like this! This would be such a fun and easy craft for a youngster's animal themed birthday party, or a last minute mask for Halloween!


Cute, right?Now that your masks are made, why not throw a party? All you is a pretty and simple cake. Let your party decor do the rest!


I also made a simple and cute cat cake topper using some leftover paper plate - punch out a circle using your craft circle punch, draw on a face and adhere some triangles for ears. Attach it to a straw with tape and plunk it straight into your cake. Matching cuteness.

I tried to get Teddy to hold on to the bear mask for a quick picture!

Check out my post on Shop Sweet Lulu here. Thanks Shop Sweet Lulu for sending me the cute tableware set!