Monday, September 30, 2013

Coco Cake Land via Instagram - Baking Galore + Alt For Everyone


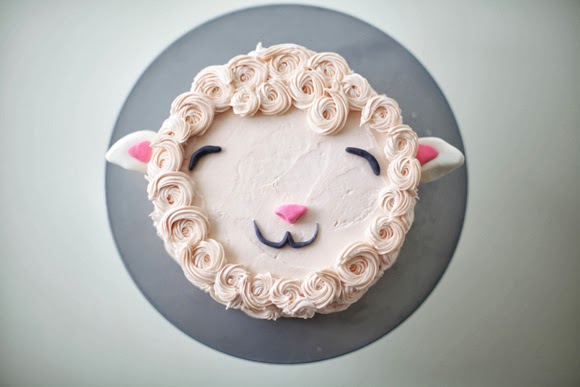
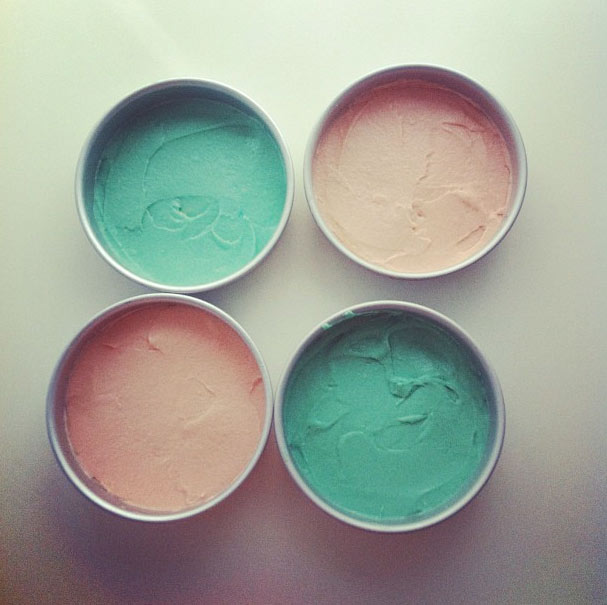
What an awesome week. I feel jam-slammed busy these days but still it's fun to be jumping from food-flying kid play dates to baking up a storm in the kitchen to styling cake photos to my kid's music class to editing and writing... this week was extra sweet because Alt For Everyone happened! Alt For Everyone is a design and blogging online conference where participants from all over the world log in and meet in an online forum. Top bloggers, designers and photographers give inspiring classes on various tools for building your blog, and it's a fun chance to meet, chat and connect with fellow bloggers from all over. It was my second time participating and I truly loved it - it's really fun to connect and build community amongst fellow bloggers - you spend so much time working behind a computer that it's just so nice to connect and chat with others who are in the same blogging boat! Plus, at $125, that's a steal of a deal, man. From coding to photo styling to how to sell ads on your blog plus inspiration and new blog friends galore - for me, worth every nickel. 


I made this washi tape moustache as part of an Alt For Everyone Instagram hashtaggy thing. Not a bad last minute moustache, right? 

So fun to chat, connect and crack jokes with: 

Melissa, sweetest baker and maker and super fun Alt chat room buddy at Lulu The Baker
Sharon, coolest mom ever who eats nachos in a hot tub while watching Dirty Dancing and throws the raddest parties (Ziggy Stardust party!) for her kids at Cupcakes + Cutlery
Jenny, garland queen and all around amazing craft stylist at Hank + Hunt

and discover new blogs such as

Danielle's blog about inspiring children's books at This Picture Book Life
Jessica's beautiful photography and visual life stories at Team Wiking 
Victoria's bright and pretty design inspiration blog Oh So Pretty
Brooke's party and inspiration blog Lemon Drop Blog 

and so many more!

I was inspired and stoked by: 

Wit & Delight's wonderful keynote - distilling your brand and defining your core message and values - and going forth and creating beautiful, consistent content based on that defining core message.

Liz of Say Yes To Hoboken started her blog as a creative outlet while working as a high school guidance counsellor. Everyone starts somewhere!

House of Brinson's awesome photo styling class - cannot wait to play around with my photos and styling and work on some more mood enhancing photos and get crazy with props.

Things I learned at Alt For Everyone, in no particular order: 

1. Favicon is a thing, not just the potential name of a sweet fantasy metal band
2. I'm not the only one who doesn't wear pants while blogging or tweeting.
3. Bloggers are such a supportive community - people really look out for each other!
4. Content is truly king - beautiful, original and engaging content is the key to growing your blog
5. Blogging is hard work - I already knew this (I've been blogging for 5 years!) But success doesn't happen overnight for anyone! Be kind, open, community-minded, work hard and create awesome content - and things will surely happen.
6. Women can rock moustaches pretty pretty good.

Happy Monday, everyone!

xo Lyndsay 


Friday, September 27, 2013

Cotton Candy Cake


Does anyone else love thin as air, wisps of nothing spun sugar cotton candy? Pale pink sugar threads fluffing and puffing up like a beehive wig, melting into your tongue like magic.

We took Teddy to our city's annual fair this past summer and I felt inspired by the cotton candy sticks in pale bubblegum pink and light turquoise.


My plan was to make cotton candy topped cake - but I didn't realize that cotton candy deflates like a tired balloon. I had purchased a take home bag of pink and blue cotton candy to bring home for my cake project, but when I went to get it from my cake cupboard, it had hardened down to flat dehydrated blocks! Rats - I had missed my chance!

Still, I felt inspired by those beautiful colours and made this adorable pastel cotton candy coloured cake instead.


COTTON CANDY CAKE MINI TUTORIAL 

1. Using your favourite vanilla cake mix, divide batter into two medium bowls. I love Rosie at Sweetapolita's fantastic recipes for both cake and buttercream.

2. Use a tiny dab of pink gel colour for the cotton candy pink and a tiny dab of sky blue colour for the cotton candy blue. Mix batter gently until coloured.

3. Pour batter into four greased and parchment paper lined cake pans - I used 7 inch round cake pans.

4. Bake according to recipe's instructions.

5. Let cool, then frost with your favourite vanilla buttercream. I used a basketweave tip to create the fine-line ribbon look. Top with a fresh single raspberry. So cute!


Come on, take a bite! Who could resist such cute pastel cake layers?

PS - you can also find me elsewhere here: 

Craftsy! Check out my post on drool-worthy simple and pretty cakes by some of my favourite cake designers.

Handmade Charlotte! So stoked to be a new contributor to one of my favourite children's design blogs. So many beautiful ideas, delivered daily! Please visit my Fluffy Lamb Cake DIY I made for them! xo

Have an awesome weekend, cake pals! 

 xo Lyndsay

Cake, photos and styling by Lyndsay Sung // Coco Cake Land

Wednesday, September 25, 2013

Lamb Cake DIY on Handmade Charlotte


I'm so excited to announce that I will be a regular contributor to the cutest DIY/design blog, Handmade Charlotte! Hooray! My first post is this fluffy lamb cake DIY - please visit my post on Handmade Charlotte for the full tutorial. Hope you like it! 

xo Lyndsay 

Monday, September 23, 2013

Raspberry Buttercream Cake

My grandma celebrated her 91st birthday on September 14th. Ninety one years old, guys. Can you imagine living that long? My grandma, who we call Poh-poh, was born and raised here in Vancouver, BC - born in a house just a few blocks from where I live now. Poh-poh was the one who gave me my pink Kitchen Aid stand mixer for a wedding present. With that stand mixer I started my baking career, and with that stand mixer 6 years later I made her this frilly ruffly raspberry buttercream cake. 


When you get to be in your 90s, you've seen so much of the world. Your dear friends, your family members, your husband or wife, people pass on and the world changes rapidly around you and you are still going. I think about my Poh-poh and how her bones, her heart, her kidney, lungs, everything is 91! Even though she looks frail and walks slow as molasses and can be scarily forgetful, to me she is still made of steel. When you get to 91 you've seen a lot of things in your life.


This is my dear Poh-poh and I, where I showed her the cake I made her. She still rocks her silk shirts and dress suits, still dyes her hair and gets perms. She's known to be ornery, kind-hearted and with a wicked sense of humour. She embodies an era of ladylike behaviour and manners. She is our connection to the past. I think of her mind like a vault with all the stories and memories tucked away of our family's history here in Vancouver, and of her own life and emotions and experience.

I joked with her that she only had nine more years to go before the big 100 - she scoffed at me and she said this would be her last birthday - which freaked me out a bit. Each birthday we celebrate with her, I know I must treasure the time I have left with my Poh-poh.

I know we can't live forever.

Friday, September 20, 2013

Cookie Problems: Peanut Butter Milk Chocolate Cookies


I got 99 problems and a cookie is one. 

Cookie problems!

Guys, does anyone else have major devouring issues when it comes to peanut butter and chocolate as a combination? A few weeks ago I was craving PB+C so bad that I put one spoon of peanut butter in my mouth, crammed in some chocolate chips and then jammed in some graham cracker crumbs. Brutal. And I wonder why my muffin top won't budge. It's more of a cookie top at this point. If you've got the craving and you have 20 minutes, you'll be able to slam these puppies together rather quickly. Plus, I used spelt flour to pretend it's healthier, so you've got that on your side, too.

PEANUT BUTTER MILK CHOCOLATE COOKIES WITH MALDON SEA SALT

You Will Need: 

1 cup of unsalted butter at room temperature
1 cup of unsalted smooth peanut butter
1/2 cup granulated white sugar
1/2 cup golden brown sugar, firmly packed
1 egg, room temperature
1 teaspoon pure vanilla extract

11/4 cups of spelt flour
1/2 teaspoon of baking powder
1/2 teaspoon of baking soda
1/2 teaspoon of sea salt

2 cups of good quality milk chocolate pieces - save some pieces to decorate the tops of your cookies. I used Lindt milk chocolate. 

a few tiny flakes of Maldon sea salt for the tops of each cookie


Make it!

Preheat oven to 350 degrees. Cover two baking sheets with parchment paper.

1. In a stand mixer or using handheld beaters, cream together the butter, peanut butter and sugars on high until light and fluffy.
2. Scrape down the bowl. On low speed, add the egg and the pure vanilla extract. Mix until incorporated.
3. In a medium bowl, sift together the dry ingredients.
4. With the mixer on low, add the dry ingredients to the butter/peanut butter mixture until a dough forms. Mix to combine.
5. Add milk chocolate pieces. Mix on low to combine.
6. Using a small ice cream scoop or your clean hands, scoop out 1 1/2 inch balls of dough evenly spaced on your parchment paper lined baking sheets.
7. Press a piece of milk chocolate onto the top of each cookie.
8. Bake at 350 degrees for 11-13 minutes, turning pans halfway to ensure even baking.
9. When the cookies are out of the oven, add a few Maldon sea salt flakes to the top of each cookie.

Now load up a plate and I'll meet you on the couch for snack and relaxation time!

Enjoy!

xo Lyndsay 


Wednesday, September 18, 2013

Dip Dye Cupcake DIY


I made the cutest little simple and easy dip dye cupcake DIY over at Poppytalk today. Click on over to Poppytalk now for the whole tutorial. It's simple as pie, guys, and colour-block cute to boot.

Happy Wednesday, cake pals!

xo Lyndsay

Monday, September 16, 2013

Coco Cake Land, Lately - Instagram Roundup


Hello, Mister guitar playing fox! Custom hand drawn topper I made for my dear friend Miko's daughter Saya's birthday ... based on a favourite cute book of hers!


A raspberry buttercream ruffly cute cake I made for my Poh-poh's 91st birthday. Yes, my grandma is 91 years old. She told me this birthday would be her last one - that she's "too old!" but I said hang on, lady! Nine more years to go before the big 100!


Poh poh with two birthday cakes (can you tell which one I made?) surrounded by 5 out of 6 great grandchildren!


Triple colour blaster neon cupcake!


My little man waiting for his daddy to get home and getting a close look at the dog I drew on daddy's chalkboard wall.


Cute handdrawn toppers I made for a bridal shower - kitty and monkey bride and groom!


Pretty cupcake wrappers ... I thought these looked like a ruffly paper flower. From a super cute DIY project (posting soon!) I made for Poppytalk!


I offer you this cupcake on this delightful mini trophy pedestal. Reach on in to the computer and grab it! :)


Pretty in pastel... cake batter!


A party for ghosts... pastel cotton candy cute cake... post coming soon! Happy Monday, cake pals! 

How was your weekend? Hope it was great... stay tuned for this week's super cute cake Wednesday DIY and Friday recipe! 

xo Lyndsay

Friday, September 13, 2013

Banana Party, Part 2: Banana Milk Chocolate Cupcakes Recipe

How cute was that banana garland from a coupla days ago? Well clearly you need the cupcakes recipe to go with it, to send your banana party into the stratosphere! 

My one year old is banana-crazy... he gnaws away at bananas until it's a mush in his hands. Then he reaches for me to pick him up and I have to freak out because I don't want gross banana hand on my nice shirt. I need to stop wearing nice shirts. Because obviously I pick him up! Little munchkin! 

So anyhoo because he's loco dingo about bananas, naturally I buy a fair amount of them... and they almost always go brown before Teddy has a chance to gobble his way through the bunch. 

Did you know banana bread is just so easy to make? And, if you throw in milk chocolate, bake the batter in cupcake pans and cover it in chocolate ganache, it becomes a cupcake? 

Banana Milk Chocolate Cupcakes with Dark Chocolate Ganache (you read that right)

Ingredients:

For the cupcakes:

1 cup unsalted butter, room temperature
1 1/4 cup golden brown sugar 
4 eggs, room temperature
2 teaspoons pure vanilla extract
4 ripe bananas
3 cups of all purpose flour
1 tablespoon baking powder
1/2 teaspoon sea salt
2 cups of milk
2 cups of good quality milk chocolate, roughly chopped into chunks (or milk chocolate chips!)

For the ganache: 
1 cup of heavy cream
21/2 cups of dark chocolate pieces

Make it!

Preheat oven to 350 degrees. Line 2 cupcake pans with cupcake liners - I used yellow for more banana power! 

1. Using a stand mixer, beat the butter and sugar on high until light and fluffy. 
2. Scrape down the bowl and add the eggs, vanilla extract and peeled ripened bananas. Mix until blended. 
3. In a medium bowl, mix together the flour, baking powder and salt. 
4. With the mixer on low, add 1/3rd of the dry ingredients to the banana mixture, alternating with the milk. Keep mixer running, then add another 1/3rd of the dry and then the milk, and one more time - the last 1/3rd of the dry ingredients and the rest of the milk until incorporated. Do not overmix. 
5. Fold in the milk chocolate pieces with a spatula. Or your bare arm. I dare ya. 
6. Pour batter evenly into cupcake-liner lined pans. 
7. Bake for 16-18 minutes, turning pans halfway to ensure even baking. Test the cupcakes by inserting a clean toothpick into the center of one - if it comes out clean, cupcakes are ready!
8. Set cupcakes on wire racks to cool. 
9. In a small pot on the stovetop, bring cream to a low boil over medium-high heat.  
10. Remove from element and set aside pot. Add chocolate pieces so cream covers the chocolate. 
11. Set your timer for ten minutes. Go check your email or surf the net. 
12. After ten minutes, using a wire whisk, stir the chocolate gently into the cream as it forms a shiny ganache. Let stand for another 20 minutes to cool. 
13. Spoon chocolate ganache on top of cooled cupcakes. Top with fresh raspberry if desired! 


If you missed it... check out my super cute banana garland DIY!

Happy Friday, everyone! xo Lyndsay

Wednesday, September 11, 2013

Banana Party - Banana Garland DIY


BANANA GARLAND DIY

How cool was I when I was 19. Real cool. So original with my Velvet Underground and Nico Andy Warhol poster hanging in my room. I remember first hearing a Velvet Underground song, I was 17 and driving in my new university city and listening to the college radio station. Nico's voice came on, droning "Femme Fatale" and I had never heard anything like it. 

Couple of years later we were on vacation in San Francisco with my family and I always liked to go to Amoeba Records because there's nothing like that anywhere else. They had loads of cool rock posters you could buy there - I remember pointing to the iconic Velvet Underground and Nico banana poster and asking for it and the guy rolling his eyes and yelling out to his friend, his voice dripping in sarcasm, "grab me a VELVET UNDERGROUND BANANA poster, please." 

You gotta start somewhere! 

Anyhoo this garland reminds of my old Velvet Underground banana poster. Wish I still had it. 

You will need: 
1 sheet of banana yellow craft paper (a slightly heavier weight paper)
scissors, black felt, mini hole punch, baker's twine, a pencil for drawing


Using your pencil, trace some banana-ish shapes on your yellow craft paper. Or you can free-hand cut out your banana shapes, like I did.

Get out your black felt! Colour in the "stems" black, and add a few random dashes and lines for banana markings. I snuck in a new happy face, too!


Using a mini hole punch (found at craft stores), punch two holes in the "black stems" of your paper bananas. 


String your baker's twine through the holes. 

Keep on stringin' until all those little banana buddies are strung along! 

Hang up your super cute banana garland on the wall or on a window and get ready to banana party it up!

I made a little banana party sign, too, and adhered it to a wooden skewer with some tape. 


Nothing screams banana party like an awesome cute banana garland! Now go put on your Velvet Underground records and stay tuned for the recipe for these cupcakes: BANANA MILK CHOCOLATE with DARK CHOCOLATE GANACHE. I will be posting it on Friday for your weekend baking!

xo Lyndsay