Showing posts with label buttercream cakes. Show all posts

Friday, June 7, 2013

Cupcake Liner Garland + Mini Party = TGIF


The easiest mini party in the world.

I baked a single layer cake in a round pan and frosted it using the classic 1M tip. 

Just fit your piping bag with the tip, fill it with buttercream frosting of your choice then swirl away on the top of your cake! A dash of colorful sprinkles and a cute little party flag and you are all set!

The garland was made using some super cute black and white gingham cupcake liners - but you could use any color or style your please. There are so many great ones out there! I just folded them in half and used double sided tape to adhere them together, strung along a simple string. I stuck it to the wall using some adorable Japanese washi tape (it's masking tape so it doesn't peel your wall paint away!) and it adds another simple cute element!

Done like dinner. A mini cake dinner.

Happy Friday, everyone!

xo Lyndsay


Friday, May 31, 2013

Rose Buttercream Cake Tutorial for Poppytalk!


As pretty, swirly and rosy as can be - check out my rosette buttercream cake tutorial over on Poppytalk today, right here! 

Happy Friday, cake buddies!

xo Lyndsay

Friday, May 10, 2013

Knot Too Shabby: Sailboat Cake + Easy Cupcake Liner Garland


Guys. This is as easy as 1-2-3. We're talking easy party idea! "Mellow sailing theme!" 


 Make a sweet and easy garland using about 24 mini cupcake liners.
 

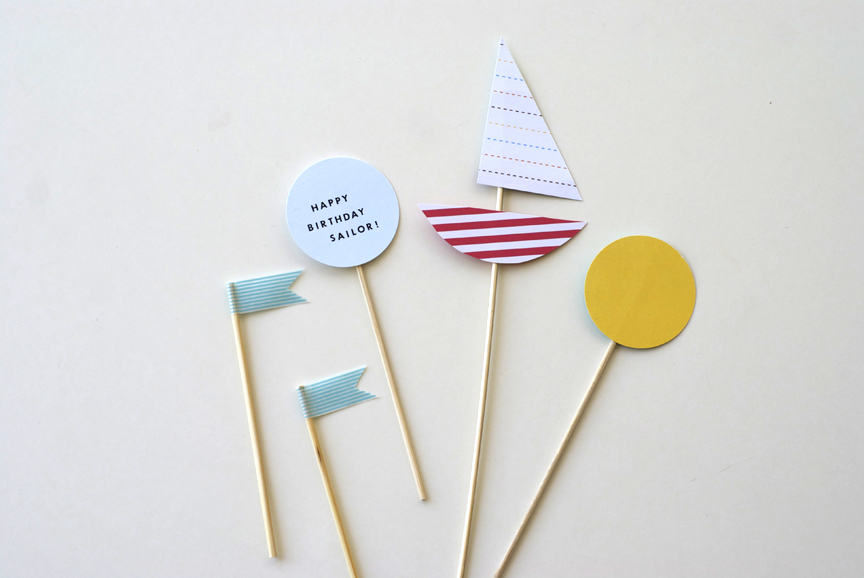
 Make some cute sailboat themed toppers using craft paper, wooden skewers and washi tape!


Pipe your cake with a wavy buttercream ocean top!

 Now, party all day and sleep all night! (that's the dream of the new moms!) I'll have a medium-large slice, please! Muffin top for-eva!


You can read more about this ridiculously easy party idea over on my guest post at the awesome blog You Are My Fave!

Wednesday, May 8, 2013

Pink Tiger Cake + Mini Ruffly Cupcake Buddies


I kind of just want to cuddle this fluffy pink tiger face and give it a big old squeeze hug! But that's just not a cool idea! Especially since I have an aversion to food, namely dairy products, on my face.

Weird, yes. You won't see me indulging in a Cleopatra-inspired milk bath. Yuck!

Although since having baby Teddy in my life, "food on the face" has forcefully turned into a No Big Deal situation for me. Ha.

Back to the cake: very cute vanilla raspberry cake for little Angelina's 3rd birthday party, ordered by her Auntie Jenny! Angelina is a year of the tiger baby, hence the girly tiger cake. Love!

Happy birthday Angelina and thanks Jenny for the fun order!

xo Lyndsay

Thursday, April 25, 2013

Pretty as a Peacock Party Cake!


Our friend Joel is celebrating a super special milestone this month - marking one year of sobriety. He is a die-hard NHL Vancouver Canucks fan (even though he is from Montana) and has never been to a hockey game - so it seemed like the coolest and most special gift ever to give him two tickets to a Canucks game! We celebrated his one-year with a blue and green party!

I'm kind of into the idea of minimalist parties these days - maybe I have dessert table fatigue? Of course I love design and matchy matchiness and craft and the love and care that goes into a mega- coordinated party... but sometimes it's nice to just throw something together on the casual. I feel inspired by Jordan at Oh Happy Day for that. Her parties always feel like just enough party-time-ness - there's a modern simplicity to it - but never overdone.

Or, maybe I've just become party-lazy!!! Ha...


For party decor, I purchased two rolls of crepe paper streamers in blue and green at my local party supply shop for $2 each, and used them to make minimal decorations around the house. The good thing about minimal decor is it's not going to cost you an arm and a leg. I twisted the two together to make a loose easy garland around the window, then cut strips of streamers in alternating colours and taped them up to the doorway! I "finished" the edges by cutting a little "V" shape into them - nerd alert!


Testing out frosting styles with my two-toned buttercream!


And a close-up of the finished cake ... Isn't this, in TLC's words, crazy sexy cool!? Ha. Head on over to CRAFTSY for the full peacock coloured buttercream cake tutorial! Yes, I'm writing for the awesome Do It Yourself blog Craftsy now and I'm very excited about it!


And there ya go. Perfect for a simple birthday party, or a bridal shower, or a peacock themed party... or a one year sobriety party! Hooray Joel! We are so happy for you.

What are some of your favourite "throw a party on the fly" tricks? Would love to hear. 

xo Lyndsay

Saturday, March 23, 2013

Lemon Lovely: Bridal Shower Cake for Katie!


Our dear family friends and old neighbors the Butts are welcoming Katie into their family as she gets set to marry Donnie in May of this year in Palm Springs! We are so sad that we're unable to make it to the wedding! As kids, Donnie and I spent many years ripping it down Blackcomb Mountain in Whistler together and I have always been fond of him. It's so great to see him with Katie, she is such a kind and cool girl and just fit so easily into the family when she first came on the scene!

I was very happy to make a super cute lemon cake with lemon creamcheese frosting and matching mini cupcakes for Katie's bridal shower! The last pic is of the beautiful women of the Butt family, including adorable little Ivy... and Katie cutting into her bridal shower cake!

I am so very happy for Donnie and Katie - happy matrimony, you guys! 

"Showers of happiness!" now and always!

xo Lyndsay

Saturday, March 16, 2013

Pretty On The Inside: Simple Ombre Cake Tutorial!


How about a slice of cake with that green beer?

St.Patty's Day is a "holiday" I don't think I ever partied to. Might be because I'm not a very good drinker, and I tend to avoid huge masses of drunken party animals. However, coloring everything GREEN seems like a real blast!  For an everything green party I'd serve guacamole, sliced cucumber, mint chocolate chip ice cream grasshopper pie, kale chips... okay, all those things sound kind of gross together!! But how about a good old vanilla cake with green ombre layers?!

So easy to make and always so exciting when you cut into it and the slices are so prettily colored. You can make this cake for any occasion, and follow the directions for any inside-colored cake!


You will need: 

1. Four medium sized bowls and four 7 inch round cake pans.
2. A vanilla cake recipe enough for four layers of cake.
3. Gel food colouring to make the ombre effect - I use Wilton or Americolor brand gel color. For this one I used Wilton in "Leaf Green."
4. Five cups of buttercream. You will need enough to fill the cake layers as well as make a crumb coat and pipe buttercream all over the cake.
4. An open star piping tip. For this, I used a Wilton 4B tip.
5. A piping bag
6. A cake board, cake stand or plate. I cover my own cake boards using craft paper, gluestick and a pre-purchased round cake board.
7. An offset spatula for frosting your cake - not crucial, you can also use a butter knife!

Make it!

1. Prepare your cake batter. Now, divide up your cake batter evenly into four bowls. In the first bowl, add a dab of food colouring (the gel colour goes a long way, so be careful!) and mix batter with a spatula until coloured. In the second bowl, add the same amount but then a little more. In the third bowl, add even more... and the fourth bowl will have the most food colouring. You get the idea, right? Ombre?

2. Bake the cake layers according to the recipe's instructions. Let cool, level your cakes (ie, using a serrated knife, carefully trim the cake so it's surface is flat and not rounded). Make your buttercream, and then:


Place the first layer of cake on your cake board, fill with frosting, and continue to stack the coloured layers, starting with the darkest colour first.


Then, start frosting the entire cake to create the crumb coat (the first layer of frosting). 
 

Now your cake is frosted! Get your piping bag ready. Snip off the pointed edge of the piping bag and nestle the piping tip into the bottom. Fill the piping bag with buttercream, and begin to pipe the sides of your cake!


Pipe all around the cake. I usually start at the bottom and go up the top, then pipe the top of the cake, too!


Above,  a closeup of what the 4B star tip piping looks like!


And finish your cake with a little matching party flag on top! See, no one's going to know this cake has a green surprise!!


But you may want to keep it out of reach of some excited baby hands... (half Chinese leprechaun?)


And that magic moment... a slice of pretty green ombre cake! 

Happy St.Patty's Day everyone ... ! Hope you enjoyed this short and easy little tutorial. Now I'm itching to make more ombre cakes in various colours... so fun!

Slice of cake photo by Amy Tran